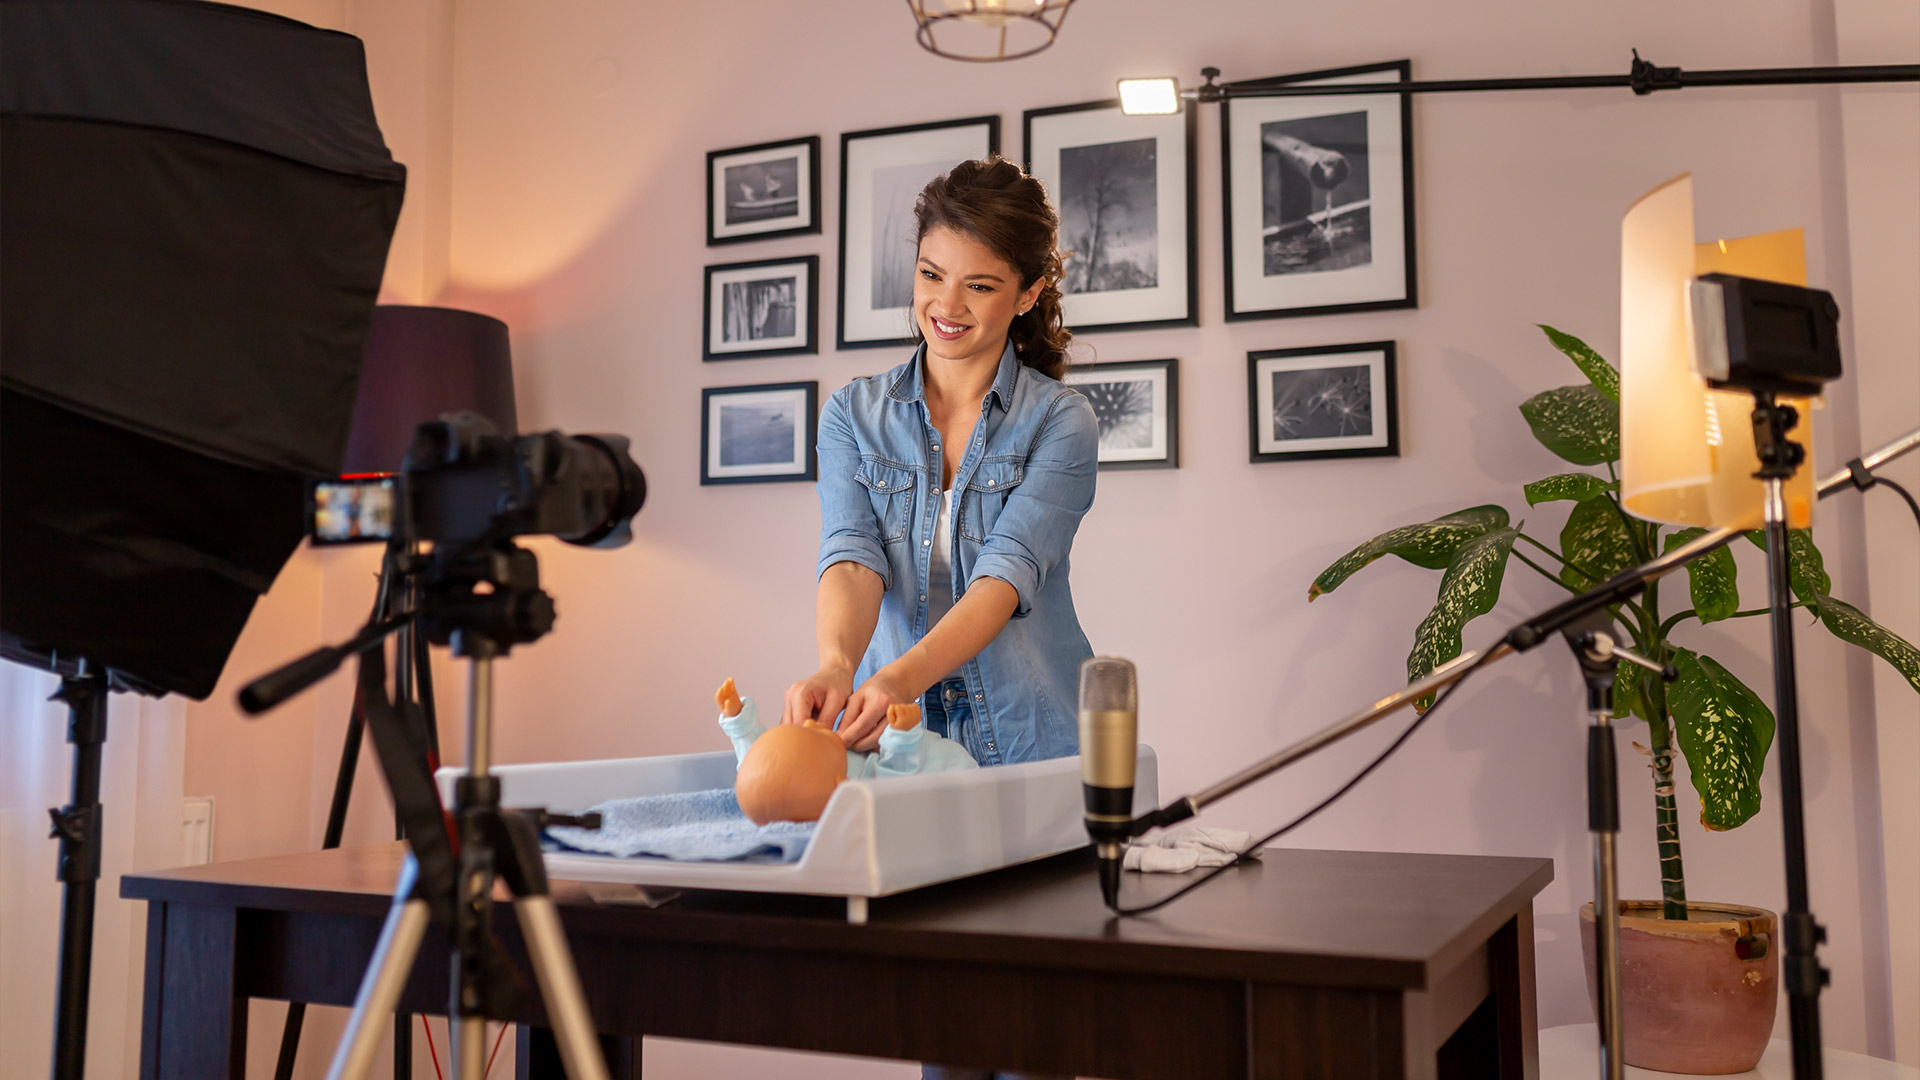
You don’t need a massive loft or an empty warehouse to create killer video content. Honestly, all you really need is about two square meters of space, some smart setup tricks, and a bit of creative hustle. Whether you're filming TikToks, YouTube Shorts, or client-facing reels, you can build a mini studio that looks way more pro than it should.
Let’s break down how to turn that tiny corner of your room into a content machine.
Step One: Pick Your Spot and Stick With It
When you only have 2 square meters to work with, consistency is key. The last thing you want is to keep moving your lights, camera, and props every time you film.
Look for a corner or a wall with:
- Natural light (a window is gold)
- A clean or blank background
- Access to power outlets
- Minimal foot traffic or noise
Once you’ve got it, commit. Make it your default “shooting zone.”
Step Two: Control the Background
No one wants to see your laundry pile or leftover pizza boxes in the shot. A small space means the background is extra noticeable—so give it some love.
Simple ways to upgrade your backdrop:
- Hang a curtain rod and use neutral fabric as a backdrop
- Stick peel-and-stick wallpaper or a vinyl decal behind you
- Use a collapsible backdrop that folds up when you’re done
- Add one or two props (like a plant, light strip, or bookshelf) for personality
You want something clean but not clinical. The background shouldn’t compete—it should complement.
Step Three: Smart Lighting = Pro Vibes
Bad lighting will kill your shot faster than any filter can fix. The good news? You don’t need a full lighting rig.
Here’s a go-to setup for tiny spaces:
1. Softbox or ring light in front – This is your key light. Place it slightly above eye level for flattering shadows.
2. Bounce light off the wall – If one side of your face looks too dark, use a white foam board or even a sheet of paper to bounce light back in.
3. Optional backlight or RGB accent – If you want separation from your background, add a small light behind you (even a color-changing bulb works).
Pro tip: Avoid overhead lighting. It creates unflattering shadows and makes you look tired (even if you are tired).
Step Four: Choose the Right Gear (That Fits)
In a tiny setup, bulky gear is your enemy. Here’s what actually works:
- Tripod with a small footprint – Look for one with flexible legs or a clamp mount
- Phone holder with rotation – Lets you shoot vertical and horizontal easily
- Compact mic – Lavalier mics or shotgun mics on mini stands keep audio clean without hogging space
- Portable lights – LED panels or ring lights with adjustable brightness save both space and sanity
And yes—phones totally count as legit cameras. Don’t let anyone tell you otherwise.
Step Five: Soundproof on a Budget
Echo is a silent killer (pun intended). Small rooms often bounce sound like crazy. Fix it with:
- A rug or yoga mat on the floor
- Heavy curtains on the window
- Pillows or blankets off-camera to absorb sound
- Foam panels on the wall behind the camera (if you’re feeling fancy)
Even just throwing a hoodie over your desk chair can help dampen sound.
Step Six: Frame Your Shot Like a Pro
Your setup is small, so every pixel counts. Think about:
- Headroom: Keep your eyes about one-third down from the top of the frame
- Rule of thirds: Don’t always center yourself—off-center compositions feel more natural
- Movement space: Leave just enough room to move your hands or shift slightly
Test a few angles by recording short clips and checking how it looks on your main platform. Vertical for TikTok and Reels, horizontal for YouTube—simple as that.
Step Seven: Keep It Tidy Between Shoots
Nothing slows down creativity like having to reset everything from scratch. In a small space, clutter builds fast.
- Use a basket or small bin to store your mic, tripod, and lights
- Mark floor positions with tape so you know exactly where to set up
- Take photos of your setup so you can recreate it anytime
- Use cable ties or Velcro straps to keep cords out of sight
Even five minutes of prep will make future filming way smoother.
Step Eight: Add Personality Without the Clutter
Your studio doesn’t have to look like a beige office. In fact, a bit of flair can help you stand out.
Try:
- A small neon sign
- A color-changing bulb for ambient light
- A poster, frame, or art print that reflects your vibe
- Seasonal props (tiny pumpkins, string lights, whatever’s trending)
Just don’t overload it. A cramped space with too many visual elements can look chaotic fast.